
Yin yoga is a type of slow and more meditative form of yoga focusing on the strengthening of the deep connective tissue like ligaments, connective tissues, and bones. Based on the ancient history of the Chinese, many of them think of the full body yin yoga sequence as a pathway of the flow of energy on our bodies.
They believe that working in the deep connectives tissues of the body will help the flow of energy entirely in our body and helps us rejuvenate.
With the increasing day demand for a relaxed and stress-free life, yin yoga has conquered its place in our daily lives.
To do the honors and help you start your yin yoga sequence at your homes we are here to provide you full yin yoga sequence. Being more specific in practice, we have 1 hour yin yoga sequence entirely planned up for you.
For a starter pack, a beginner can also take a look at out 30 minutes yin yoga sequence at home.
So let’s start!!
Full body yin yoga sequence
Just as yang yoga deal with full-body muscle relaxation and strengthening yin yoga is all about deep tissues. A yin yoga practitioner can have a full-body yin yoga sequence that can help him struggle with every tissue of his body.

Most of the poses in yin yoga can be performed in a time frame of 3 to 5 minutes or in some cases it may increase up to more than 10 minutes.
Every pose of the yin yoga sequence is mainly pivotal to the areas where there are joints, bones like the spine, and sacrum.
Now let us help you guide with the yin yoga sequence that you can practice at home.
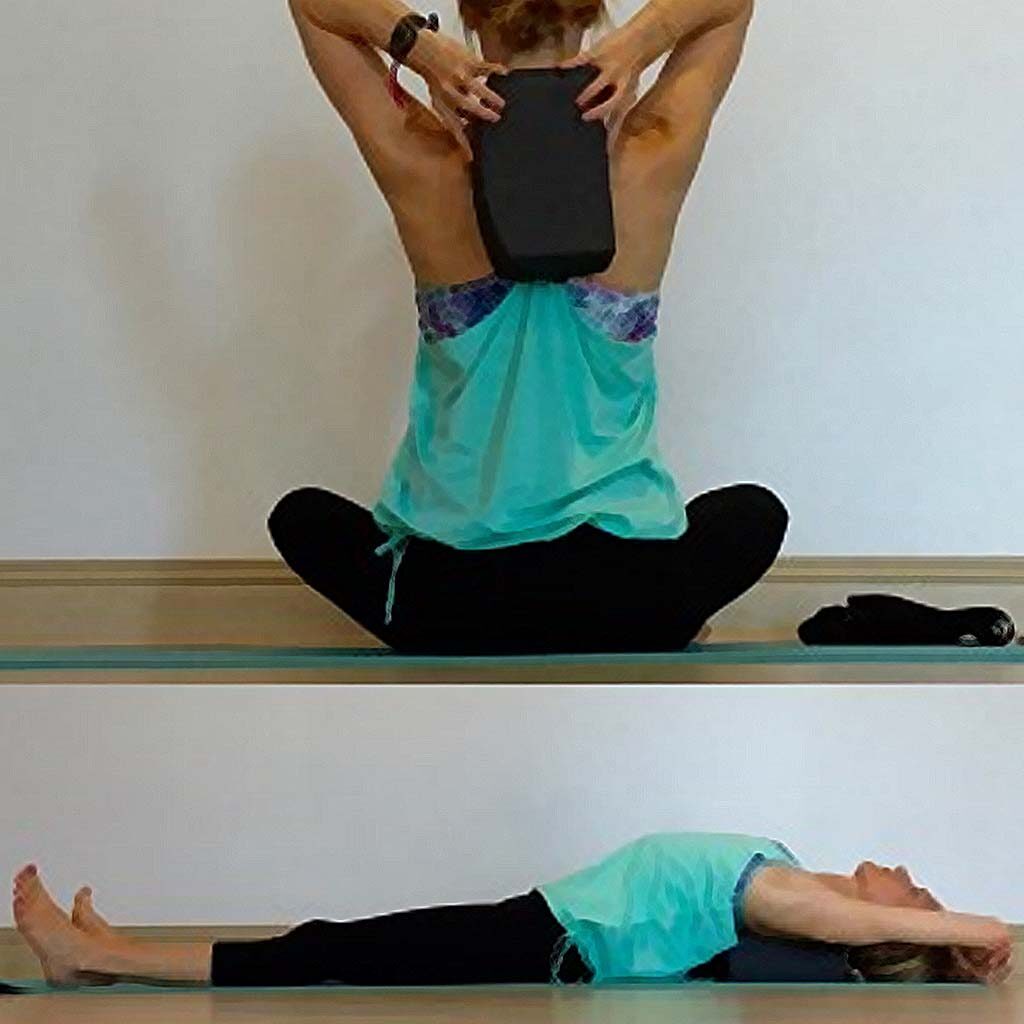
Upper Back Release Pose
Pose time: 5 minutes
This can be done with the use of a block or a towel maybe. This pose is the back stress reliever. To initiate, place a block between your shoulder blades in the back. Then lying with this on your back with the comfortable posture of legs can be helpful. The more you stay still the more space for the block will be created.
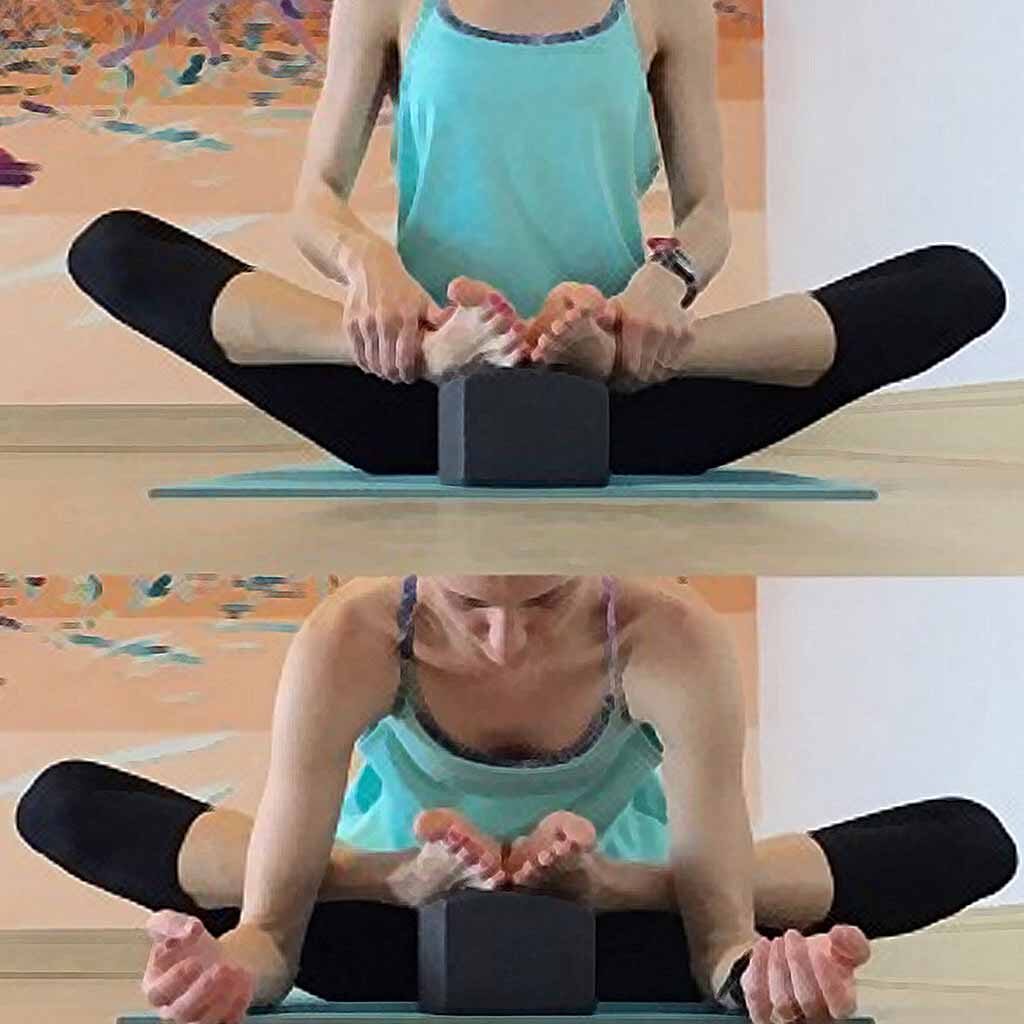
Butterfly pose
Pose time: 3 minutes
This is the pose for your hips, backspin, and legs. Just as the name indicates, this pose will lead to the butterfly wing flaps of your legs. To start the pose, sit straight with your legs bent at the knees. Now join the souls of your feet with one another on the block by placing it in front of you.
You can also support your knees by placing something below them for your comfort. Now hold your breath and bend down at your back until you feel the pull. Hold still to that position and release back your breath with restoring your original position.
Twisted Deer Pose
Pose time: 3 minutes
From the butterfly pose, you can initiate this pose while your hips remain open. For this pose slightly extend your one leg backward with a bit of lift of your one hip. With another leg on the butterfly, the pose will help you extend yourself forward. Now stretch your torso downwards parallel to the ground with your head standing on the block for support.
Bend and extend forward until you feel the pull in your hip and back area and release back to the normal position after holding the pose for 3 minutes.
Repeat the pose with the other leg folded backward.
Pigeon Pose
Pose time: 5 minutes
This pose is the extension of the twisted deer pose. By being in the deer pose, you can extend your back and leg more by straightening your back. The other leg remains the same as before. Here the difference is that the leg extended backward is straight without a bend in the knee area.
If it gives you unbearable pain so you can use yoga blocks or other supporting accessories to support your joints and bones at the start.
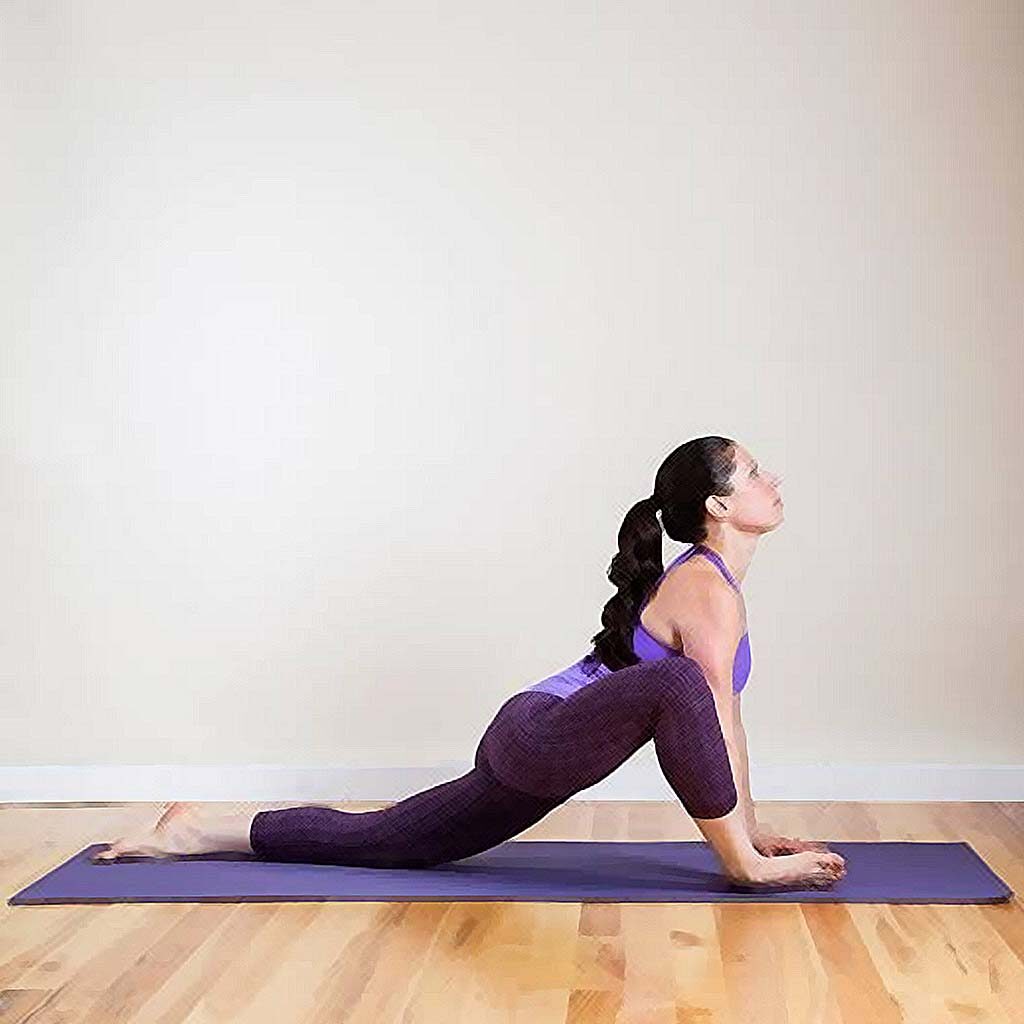
Lizard Pose
Pose time: 4 minutes
From the previous pose, you can start this pose. From the pigeon pose, you can lift your torso upwards with one foot anchored to the ground. The foot must be grounded in a way that you can place your hands on both sides of your heel.
From here you can either extend your hands and arms up or you can stay in the same position.
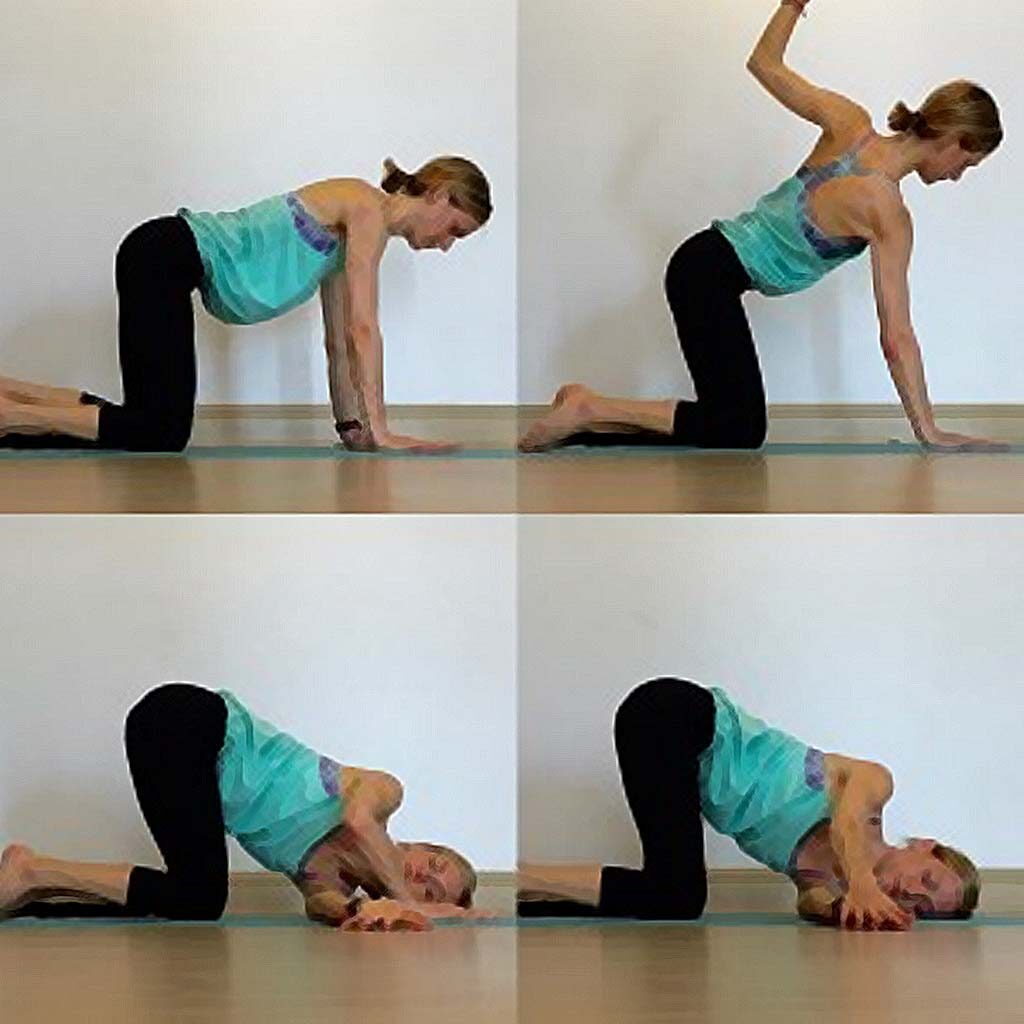
Threaded Needle Pose
Pose time: 3 minutes
You can start this pose by coming to the nice tabletop pose. From there you can lift your left arm with the inhale of air and release the air as you pull back your arm back. The left-arm should be pulled in a way that your left shoulder becomes grounded along with your head on a block or any other resting accessory.
Relax the left arm on the ground while pulling your right arm in the twisted position over the body.
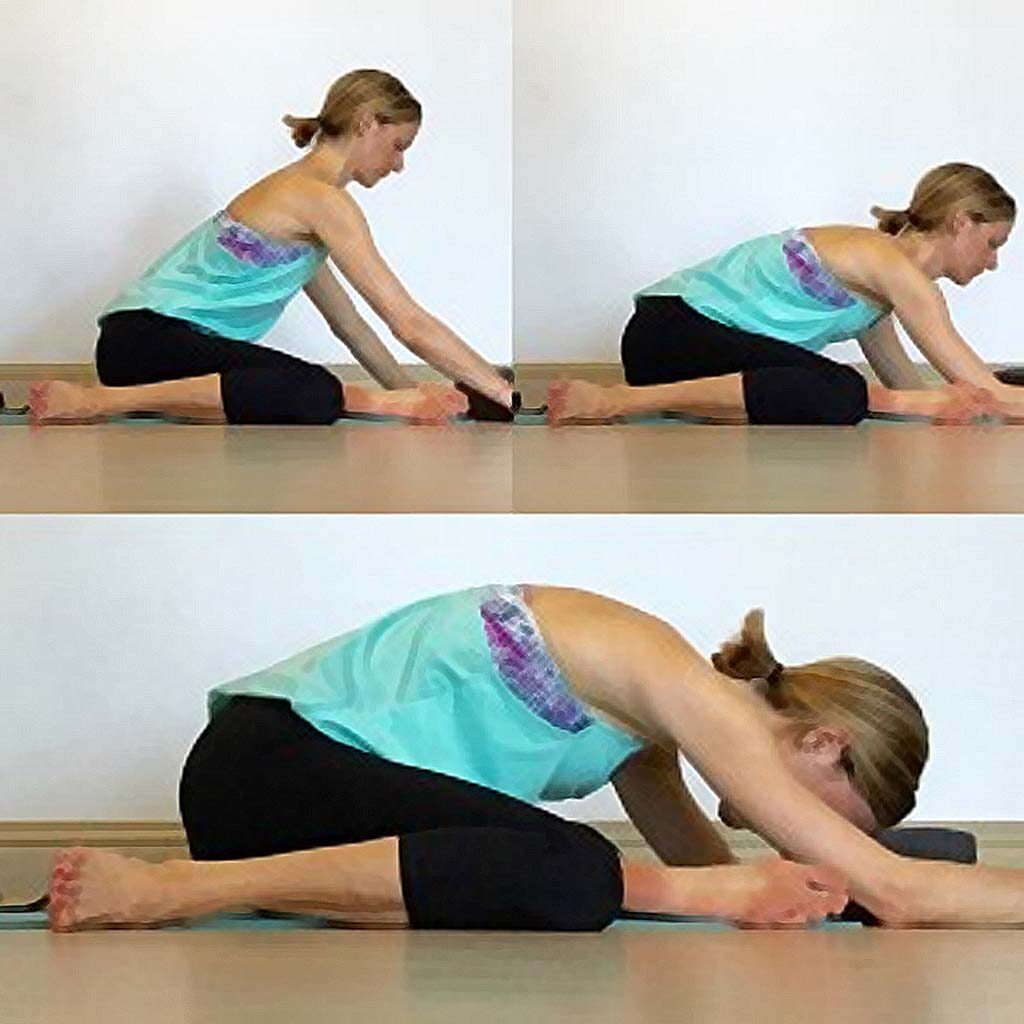
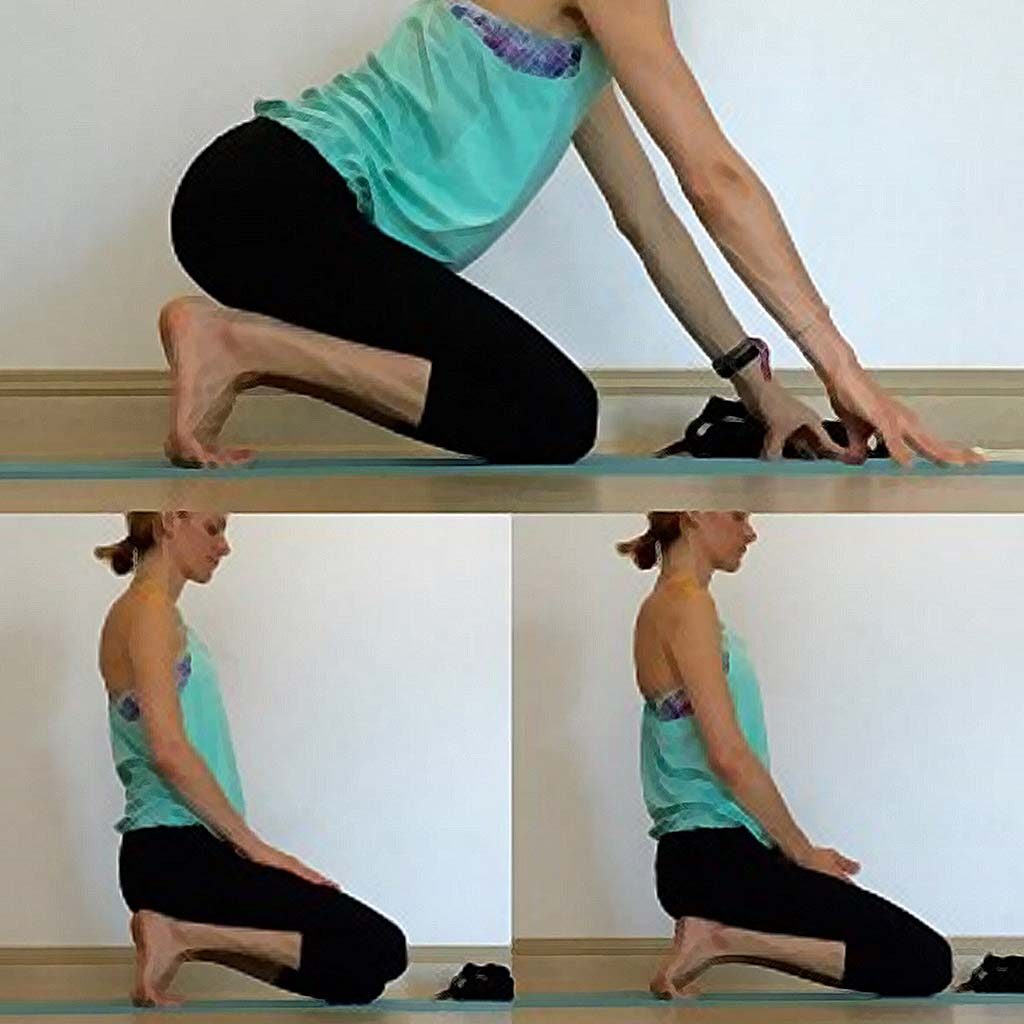
Toe stretch Pose
Pose time: 2 minutes
From the Child pose, slightly lift yourself up with all toes tucked up to the ground and hands laid in front of you. Now in the same bent position start to move your hands inwards towards your toes. This can be difficult when tried newly so you can be in the same position without the movement to feel the sensation.
Breath heavily while in this position with all the toes completely tucked in.
Triceps Release Pose
Pose time: 1 minute each side
To start this pose, bend your left arm in a way that your hand gets placed on the lower back area. Now take your right arm to the left elbow and push the elbow towards the back. Note that the right hand should be across the chest.
There should be a point where there is a balanced space between two arms and you can extend the arms until you feel the real pull. To reduce the tension in the neck, you can bend your neck towards the bent arm shoulder.
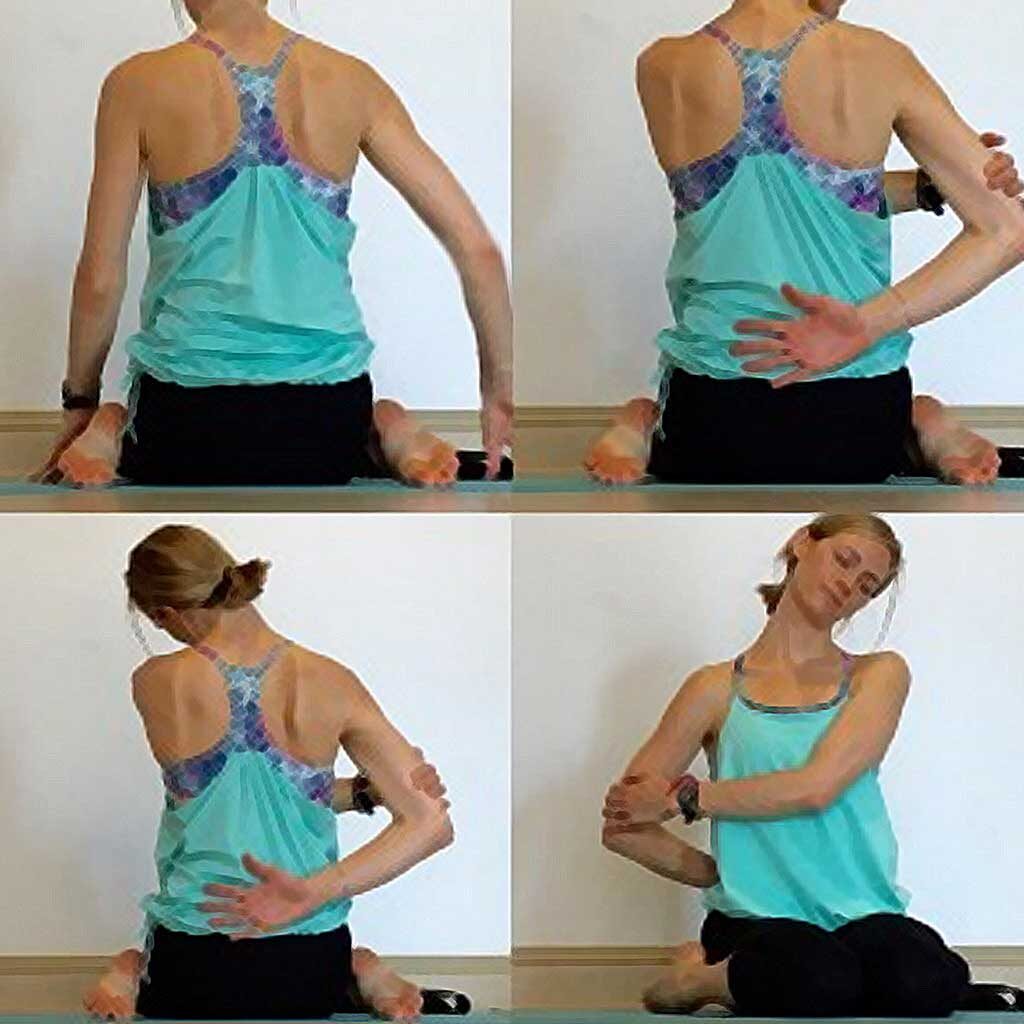
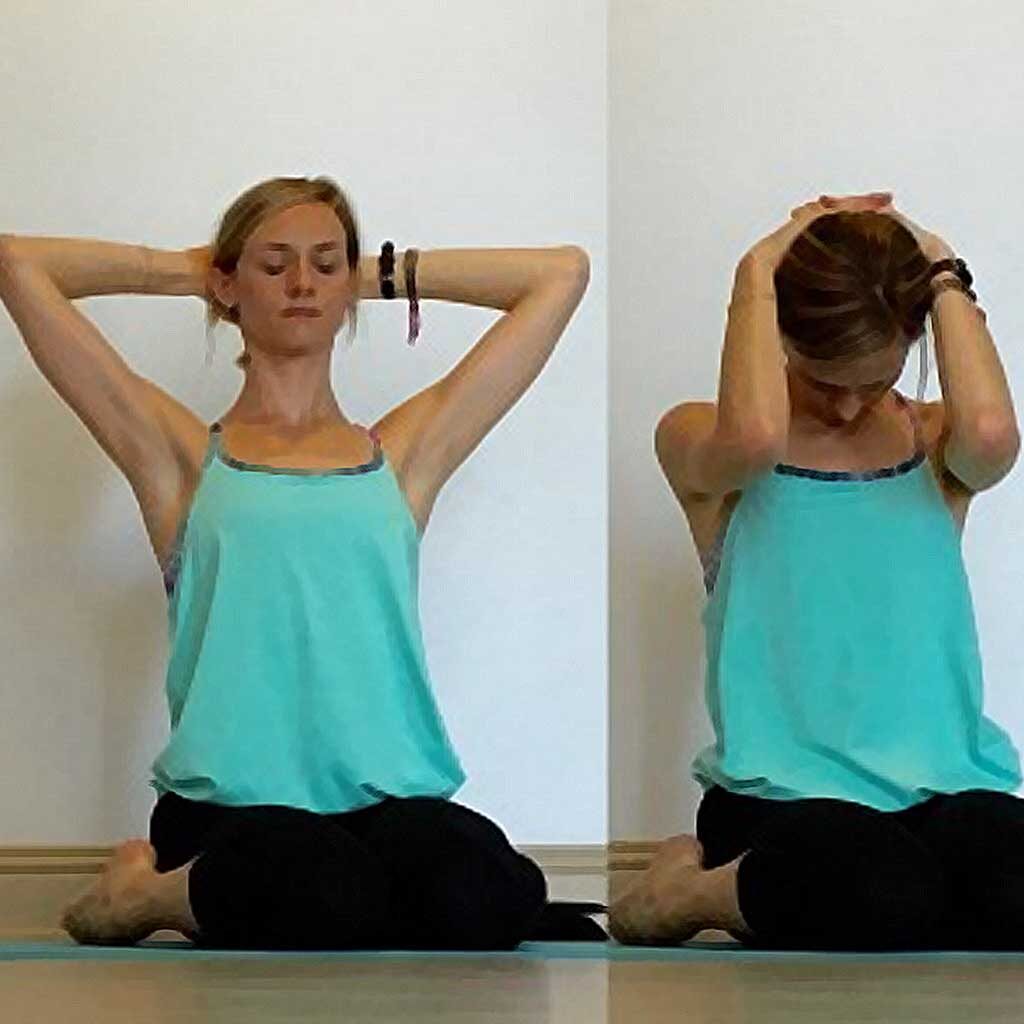
Back and neck release Pose
Pose time: 1 minute
This is relatively an easy one to conquer. To get into this pose, all you have to do is to sit relaxed with your neck and head in a neutral position. Now place your hands behind your head with the lifted arms. Now slowly roll down your chin towards your chest with your arms and hands putting additional weight on your head. You can also move your neck sideways to release the access tension.
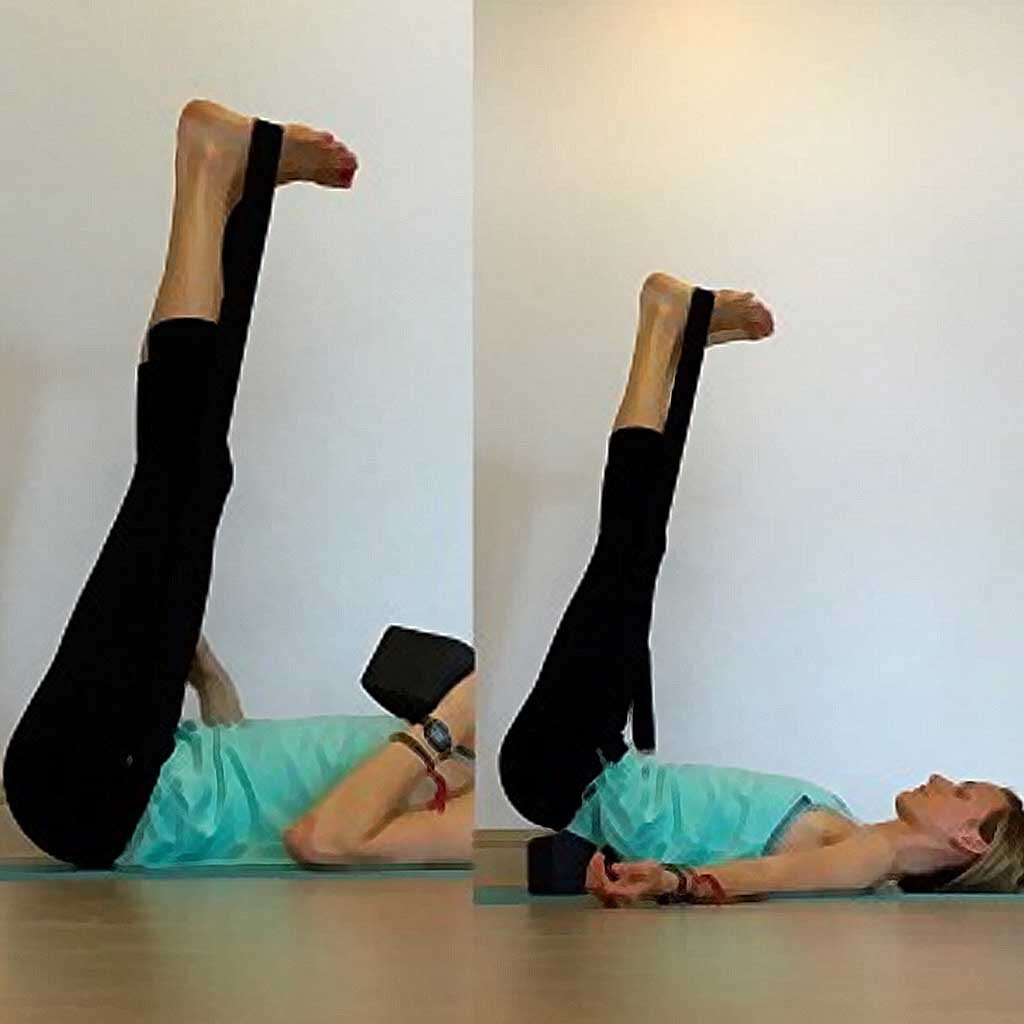
Legs up the wall Pose
Pose time: 3 minute
To get into this pose you have to get along a wall. For your support you can also use a string or a yoga strap. To perform this pose you have to elevate your legs beside the wall towards ceiling. This will help your legs tissues to relax and feel the stretch from toe to hips.
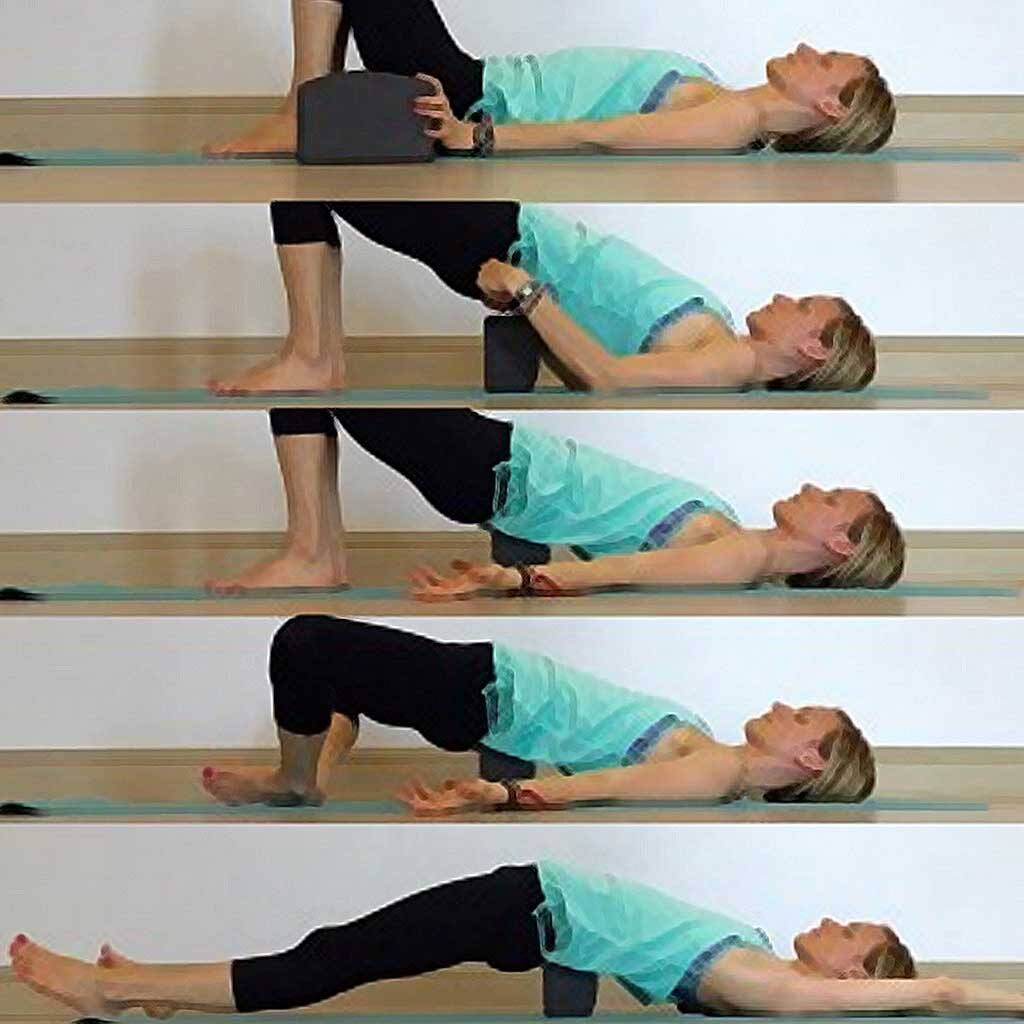
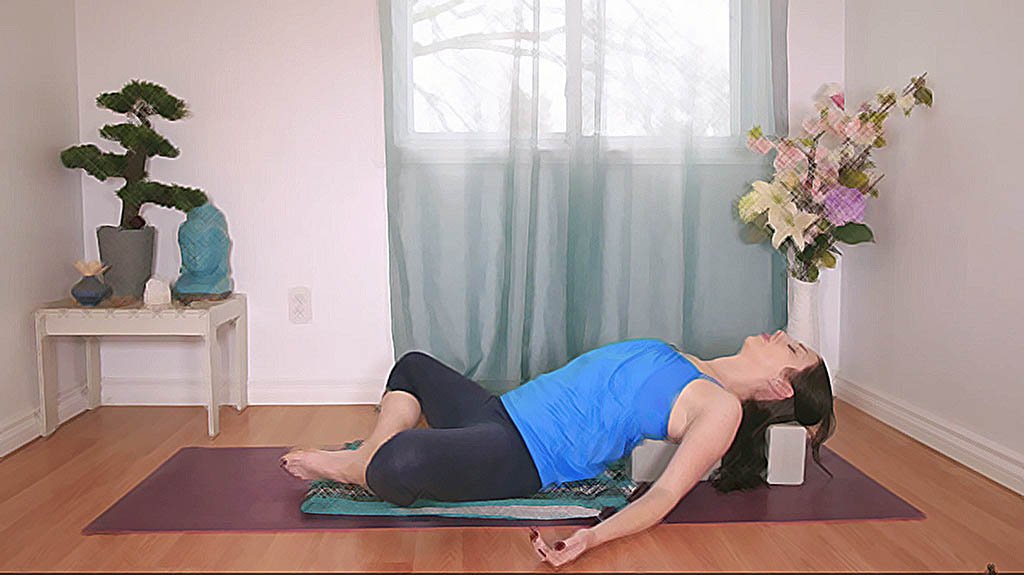
Supported Bridge Pose
Pose time: 4 minute
From the legs up the wall, place a yoga block or a towel at the position of the sacrum below your back. Once you have the block on the right point where you can put your whole body weight without any damage you can lower your legs. During this pose, you can also move your legs to a comfortable point or you can simply lie them down with the block support at the back.
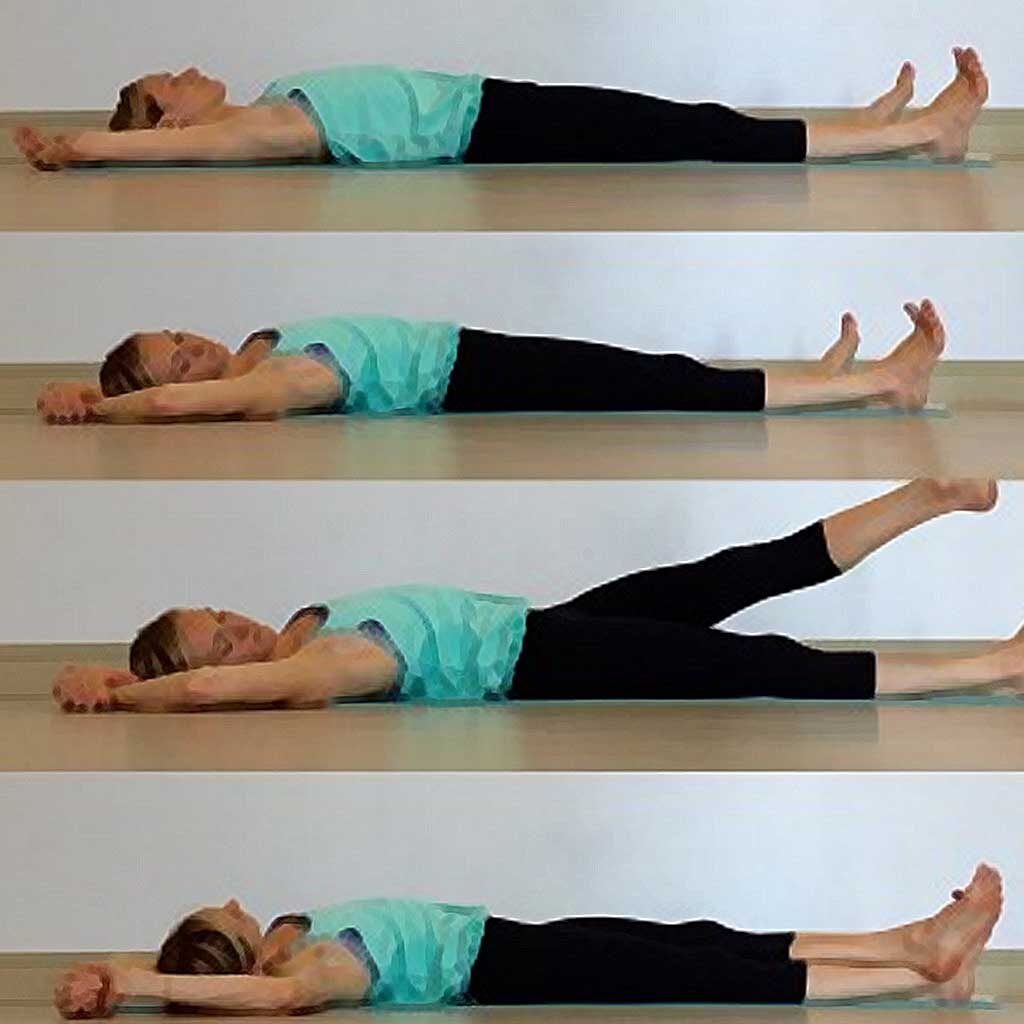
Banana Pose
Pose time: 4 minute
Lie down on the ground with your hips and back touching the ground. Now open your shoulder blades and extend your arms upwards on the ground above your head. Move you legs and ankles apart in line to the shoulder blades. Now life your right ankle and make over the left ankles in a criss Cross position. Along this leg movement, move your head sideways to achieve the banana shape.
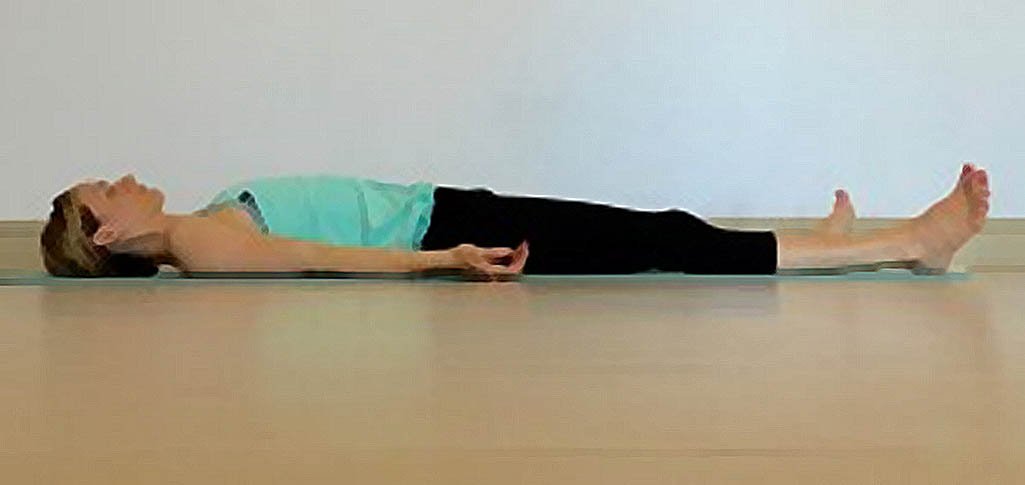
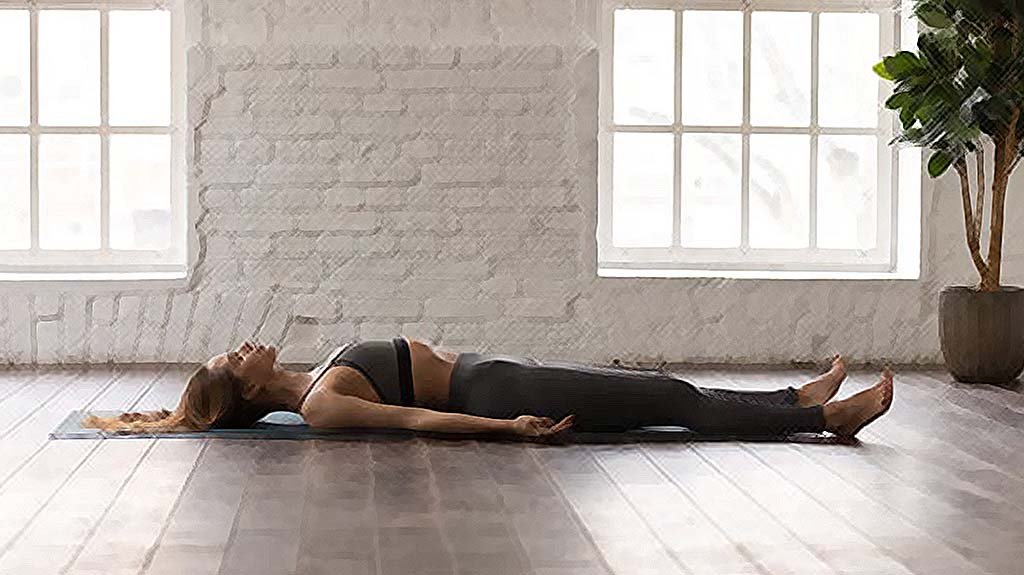
Savasana Pose
Pose time: 7 to 10 minutes
This is the pose for gaining back your breathing rhythms and the soak-up process of all the energies and spaces you have created through this entire effort. To get to this pose it is all about leaving your body for the gravitational pull while lying on the ground peacefully.
Do not push yourself in this pose and relax until you have your breathing normally.
1 hour yin yoga sequence
As discussed earlier, we are nearly done with a full body yin yoga sequence. Just to save you efforts let us give you the best of what you can achieve in 90 minutes cycle. 1 hour yin yoga sequence is an all-rounder for every inch of your body in a balanced proportion.
Every pose in this sequence is also to be maintained from 5 to 8 minutes and you should try not to hurt yourself in expanding your body space and tissues. Start with the point you are actually comfortable sustaining and move progressively.
So let us all get started with our 90 minutes cycle.
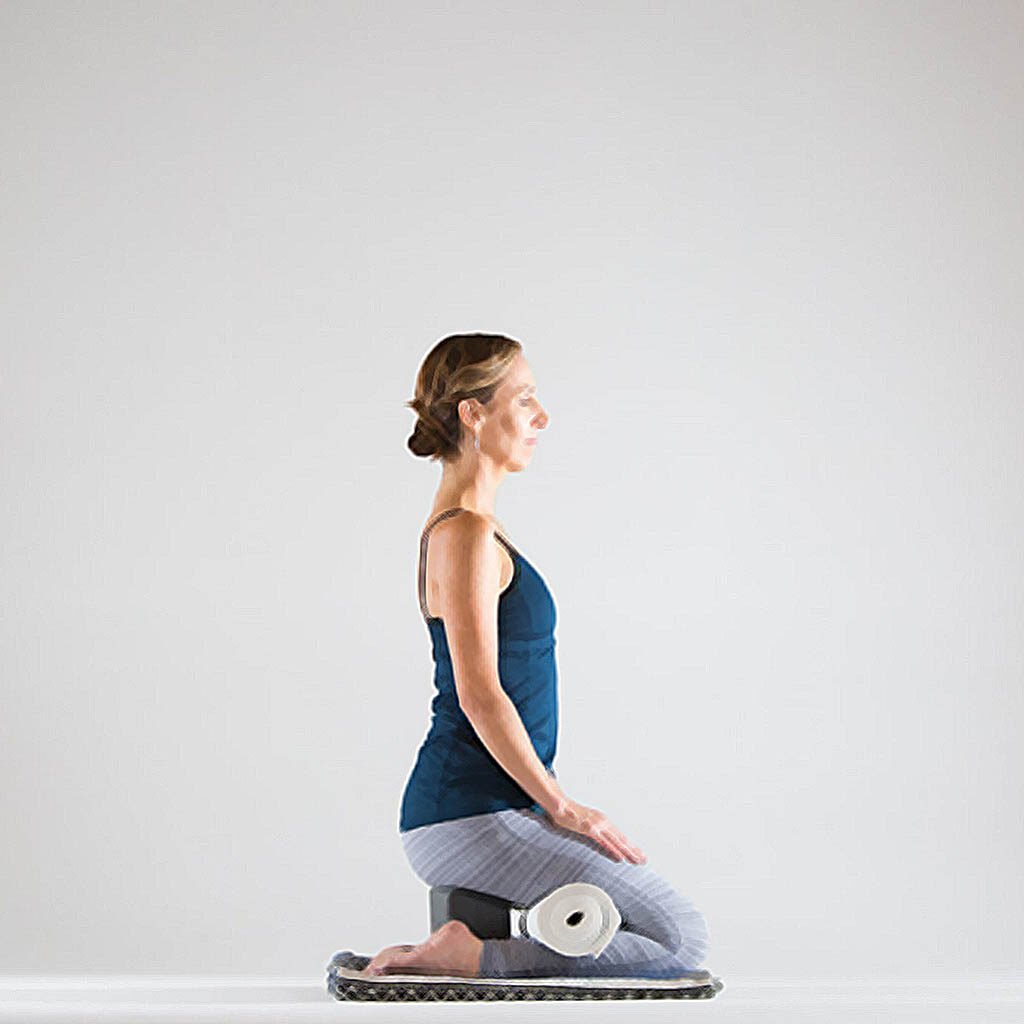
Grounded Meditation Pose
Meditation may seem easy but there is a need for strong body and mind balance in doing so. To get yourself started sit back on the ground with the usual crossed leg meditation pose and straighten up your back and neck. Try to find the perfect center point for your body to gravity to act upon. Try to keep breathing with your normal pace.
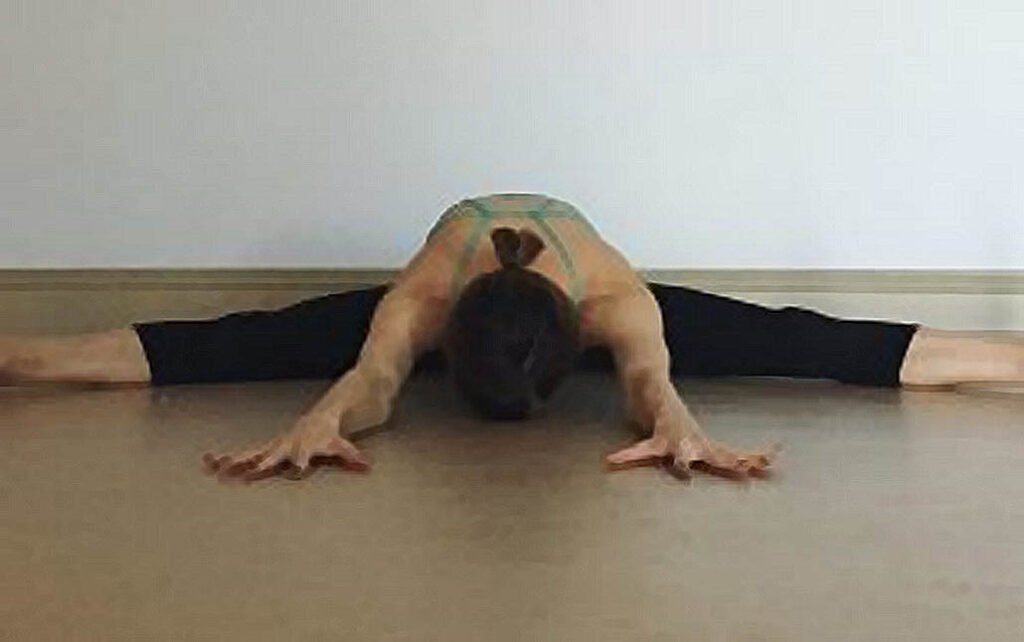
Straddle Fold Pose
This pose is an upgrade from the meditation pose and works your legs and knees. While sitting still, extend your legs outwards on both sides with a strong inhale of breath. Now move your hands forward in a crossed manner and place your head on the floor to reduce the restrain on your back and head you can also use a block or booster instead. Also to avoid the extra tension on your knees you can leave a little bend in that area as a beginner.
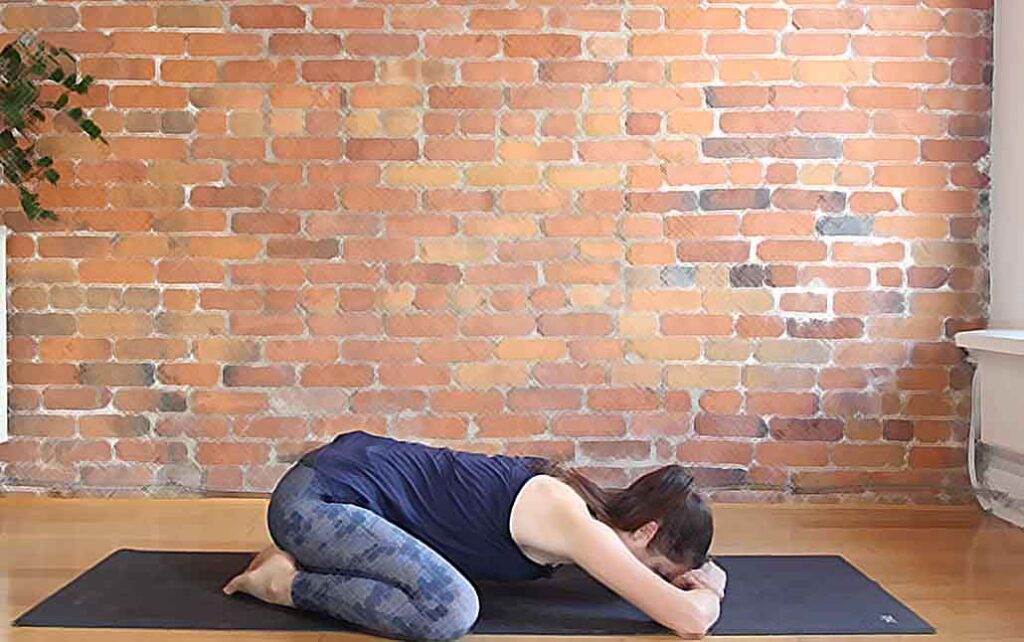
Wide-legged Child’s pose
Just as the name of the pose indicates, this is another pose with wide legs but now in a different direction. To initiate, get down on your knees and hands with the legs bent and folded outwards. You can expand the legs according to your ease. Now move your arms forward so that your head and heart lean on the ground. To ease the pose you can rest your head on a block and lower your hips accordingly on your heels.
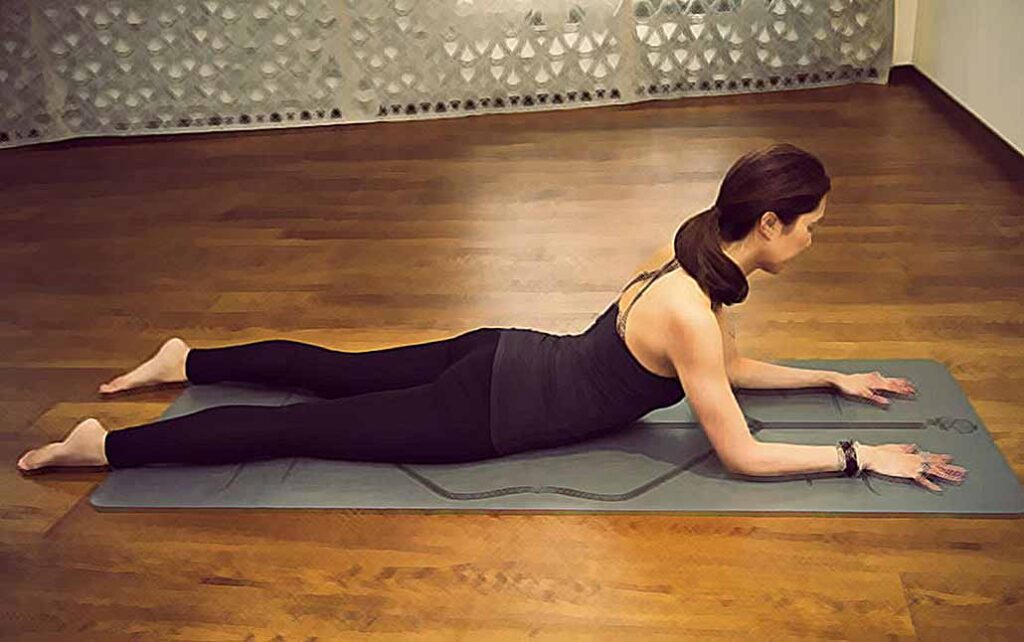
Sphinx pose
This pose is a typical back-bending pose with all the lower body grounded to the floor and with the upper body raised up. To get into this pose lie down on your belly and with your arms and hands in line with your elbow and shoulder. Make sure your legs are straight at the back with toes untucked from the ground. After all the adjustment of limbs, lift your head and shoulder up with the maximum bend you can bear at your back.
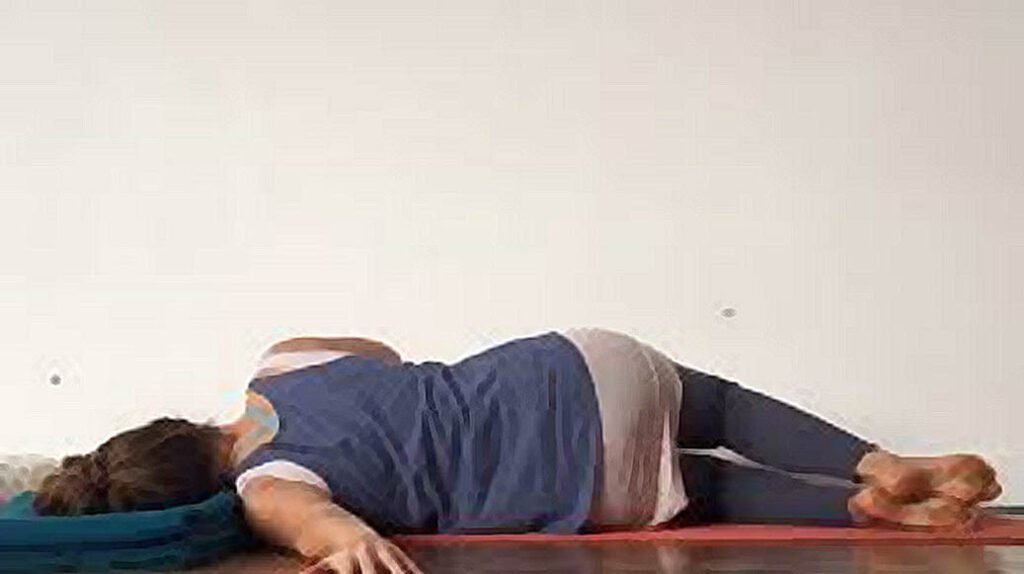
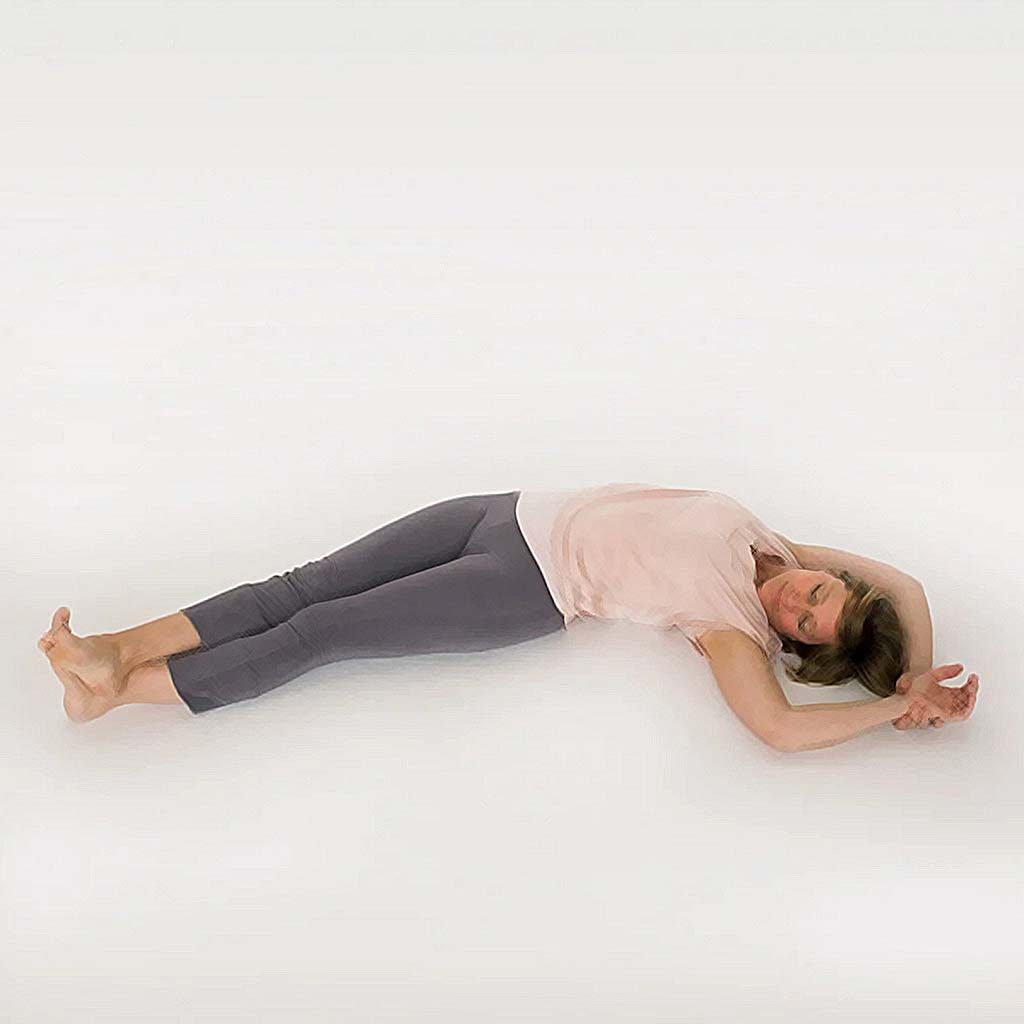
Laying chest opener Pose
Starting from the sphinx pose, make yourself fully laid on the ground or a yoga mat on your belly. Now move your left hand on the edge of the left side of the yoga mat. While keeping the right arm straight in line with your shoulder, move or turn your face towards the left side. Carry this turning movement from your head to hips with the legs turned in towards your belly. For to maximize the stretch, you can hug your knees with your left arm or find a good place to inhale. Before changing the side, consider coming back to the neutral position first and then change sides.
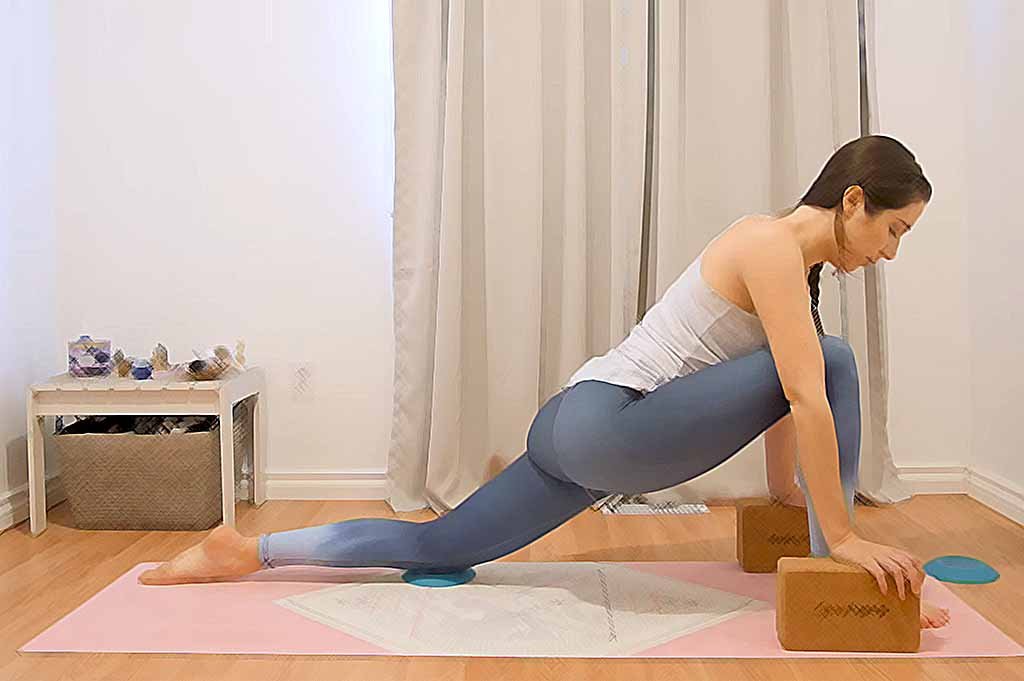
Dragon pose
This pose helps you open up the hip flexor muscle and is easy to achieve. To make it easier at the start you can use a yoga block for your hand and foot placement. Place your hands on both blocks and place your foot in the center of your arms and chest. With other legs straight back try to maintain this pose to open up your hips.
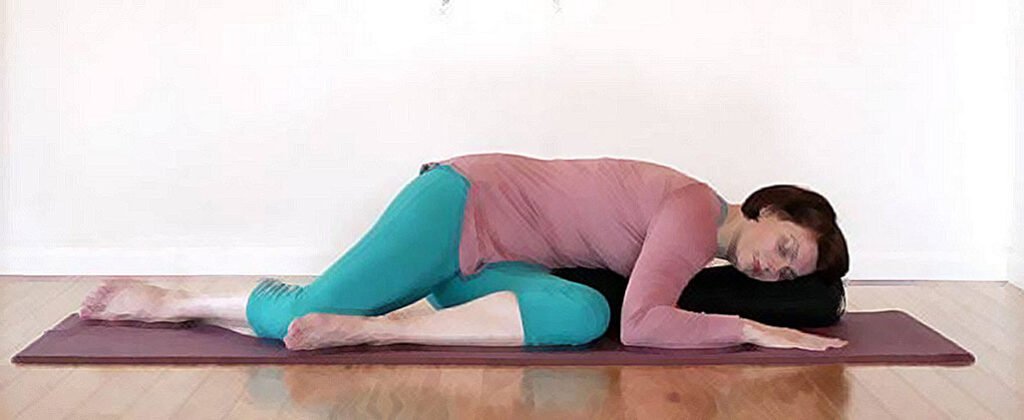
Swan pose
From the dragon pose, you can get to the Swan pose with ease. To initiate move your arms and hands forward above your head on the mat. Now move your left leg under your belly with a 90-degree angle to the body. With the other leg strengthened backward, place your head on the hands and make a complete pulling sensation on your hip and leg. Hold on to this position for some time and then change it to the other legs. You can use helping props for supporting your head or leg during the pose performance.

Supported fish pose
To get into this pose, be seated on the mat with your knees opened as just was like in the butterfly pose. For support to your head and back, place a bolster behind your back in between shoulder blades to support your back. Now lean yourself onto the bolster with your palms up and head relaxing on the bolster. Release your body’s stress and tension completely while resting on the prop.
Savasana Pose
We are finally at the last stage. Yes, you did it!!
This pose is generally placed to know your body’s changes that you have achieved after putting so much into all those mentioned poses. It’s all about letting yourself melt into the mat with your limbs stretched apart and let gravity do its work. Put your head at rest on the mat with your eyes closed and feel the sensations developing in your body.
30 min yin yoga sequence
Yin yoga can be a task when you are already tired of your daily workload but still managing your yin yoga sequence can be helpful. Many of us including me have a hectic routine on daily weekdays but performing yoga should never be an option.
To deal with the hectic routine and time management I present you the minimized version of the yin yoga sequence. This 30 minutes yin yoga sequence can be short and fulfilling with all that your body needs to relax and soak all the goodness of yin yoga.
So let us head to another conquest of keeping ourselves healthier and active even in smaller time frames and hectic routines.
Constructive REST pose
Pose time: 3 minutes
Like all other sequences, 30 minutes yin yoga sequence starts and ends with a rest pose. Here in this pose, all you have to do is to prepare your body and tissues to create all the spaces. For this you have to lie down and melt down your body with limbs spread apart from your body
Do take control of your breaths and soothe them for further poses ahead.
Banana Pose
Pose time: 3 minutes each side
To enter this pose, lie down on your yoga mat with one foot over the other in a crossed behavior. Maintain a center point of your body at the hips region and bend your lower limbs are in the right direction while crossed over one another. Now cross your arms over your head and manage to hold your elbows with the opposite hands and twist over to the side in the direction your legs are in. For a further stretch bend your neck in that direction as well. As a result, your body will for a curved banana shape. Do the bending on each side for 3 minutes.
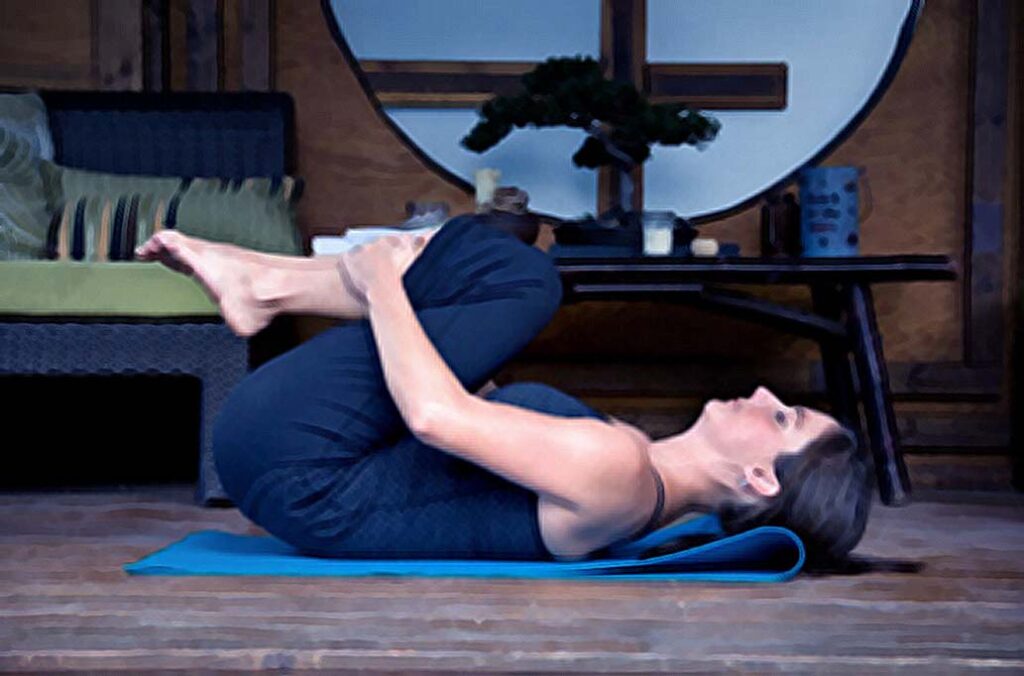
Knees to chest pose
Pose time: 2-3 minutes with deep breaths
This pose refers to the general abdominal as well as the hip and back muscles and tissues and builds up your core. To start, it is hardly a pose I can say but serves a lot. Bend both knees towards the center of your body. Try to snug in your knees closest to the stomach area but as a beginner, you can stop at your comfort area. With the consecutive bending and straightening of knees take deep breaths and hold onto it while you again straighten up your legs.
Half butterfly pose
Pose time: 3 minutes
Sit on the yoga mat with your legs extended forward. Now take your right leg and bend it inwards such that the sole of your right foot touches the inside of your left leg. Try to keep the other leg straight. Now bend yourself at your hips and lower your back with your head towards your chest. To gain more balance place your both hands on the yoga mat and keep your back and neck muscles relaxed and then change sides.

Sleeping Swan Pose
Pose time: 3 minutes
This pose can be done by lying down straight on your belly with knees and hands tucked on the ground. Now slightly turn your left leg inwards under your belly area whereas the other leg remains straight. To gain more balance with this pose you can move your arms and hands forward away from your head. Rest your head on the mat as well. You can use yoga blocks for supporting your head during this pose.
Legs up the wall pose
Pose time: 6 minutes
Lie on the ground with your hips intact with the wall. Swing your legs up against the wall and try not to bend at your knees while doing so. Balance your upper body in alignment with the hips. In this pose, you can either spread your arms above the shoulder blades or drop them downwards.
Savasana
Pose time: as long as you like
Meltdown on the ground leaving your body for the gravity to work upon. No force should be applied by you on your body. Lie down and regain your normal breathing rhythms.
How long are poses held in yin yoga?
Yin yoga is a sequenced series of long and floor poses mainly focusing on the connectives tissues of the lower body and back. These poses can be held for different take frames depending upon the area of action and the comfort zone of the person performing. Mainly an average pose in the yin yoga sequence can prolong from 3 minutes to 5 6 minutes. In resting poses you can prolong a pose for as much as you like.
Can you do too much in yin yoga?
Yin yoga puts stress on your connective tissues and muscles. Too much long help poses with many stresses can prove to be harmful to your muscles and connective tissue. It can be even damaging when the stress is too strong or held too long without a precaution or a time measurement.
Why is yin yoga so hard?
Yin yoga is all about ins and out or bending of your body at various soft points and joints that make it hard than other types of yoga. Apart from the ins and outs, the struggle of maintaining the balance between the physical body and mental focus. But still many of the performers find it challenging and fun with all its transforming poses and time division.
Does yin yoga help lose weight?
Yin yoga is a type of restorative yoga that not only functions to make the functionality of your internal organs and limbs more restriction-free but also helps a person to reduce a significant amount of weight when done regularly.
Our Final words
Yin yoga being the stress reliever is a fun and challenging sequence all at one time. For everyone who wants to endure the best of a yin yoga sequence, we have put down the best feasible yet challenging poses for different time frames. Starting from the full body yin yoga sequence to 1 hour yin yoga sequence and then to the final 30 minutes yin yoga sequence we have mentioned it all.
Now all you have to do is to sit back and get yourself motivated to perform the best of it. With our guide of yin yoga sequence for different time frames, I hope we can get you started for a mere 30 minutes sequence initially and then gradually going up to a better time period.
I hope to help all of you out there to grow mentally and physically by using the yin yoga sequence.
Till then happy yoga and stay safe 😉